Setup the Screen — your game's blank page
Before anything can move, you need a window for the game to live in. That's what Stage 2 builds: an 800×600 window called Galaxy Defender, plus a clock to keep the game running smoothly.
🧠 Quick Recap (30 seconds)
Before we dive in — can you remember from Lesson 1 (Imports)?
Q1. What does import do?
It grabs a library — a pre-written toolbox of code — and brings it into your program so you can use it. import pygame means "I want the graphics toolbox."
Q2. Which library is the GAMES toolbox?
pygame. It draws shapes, plays sounds, reads the keyboard, and runs game loops.
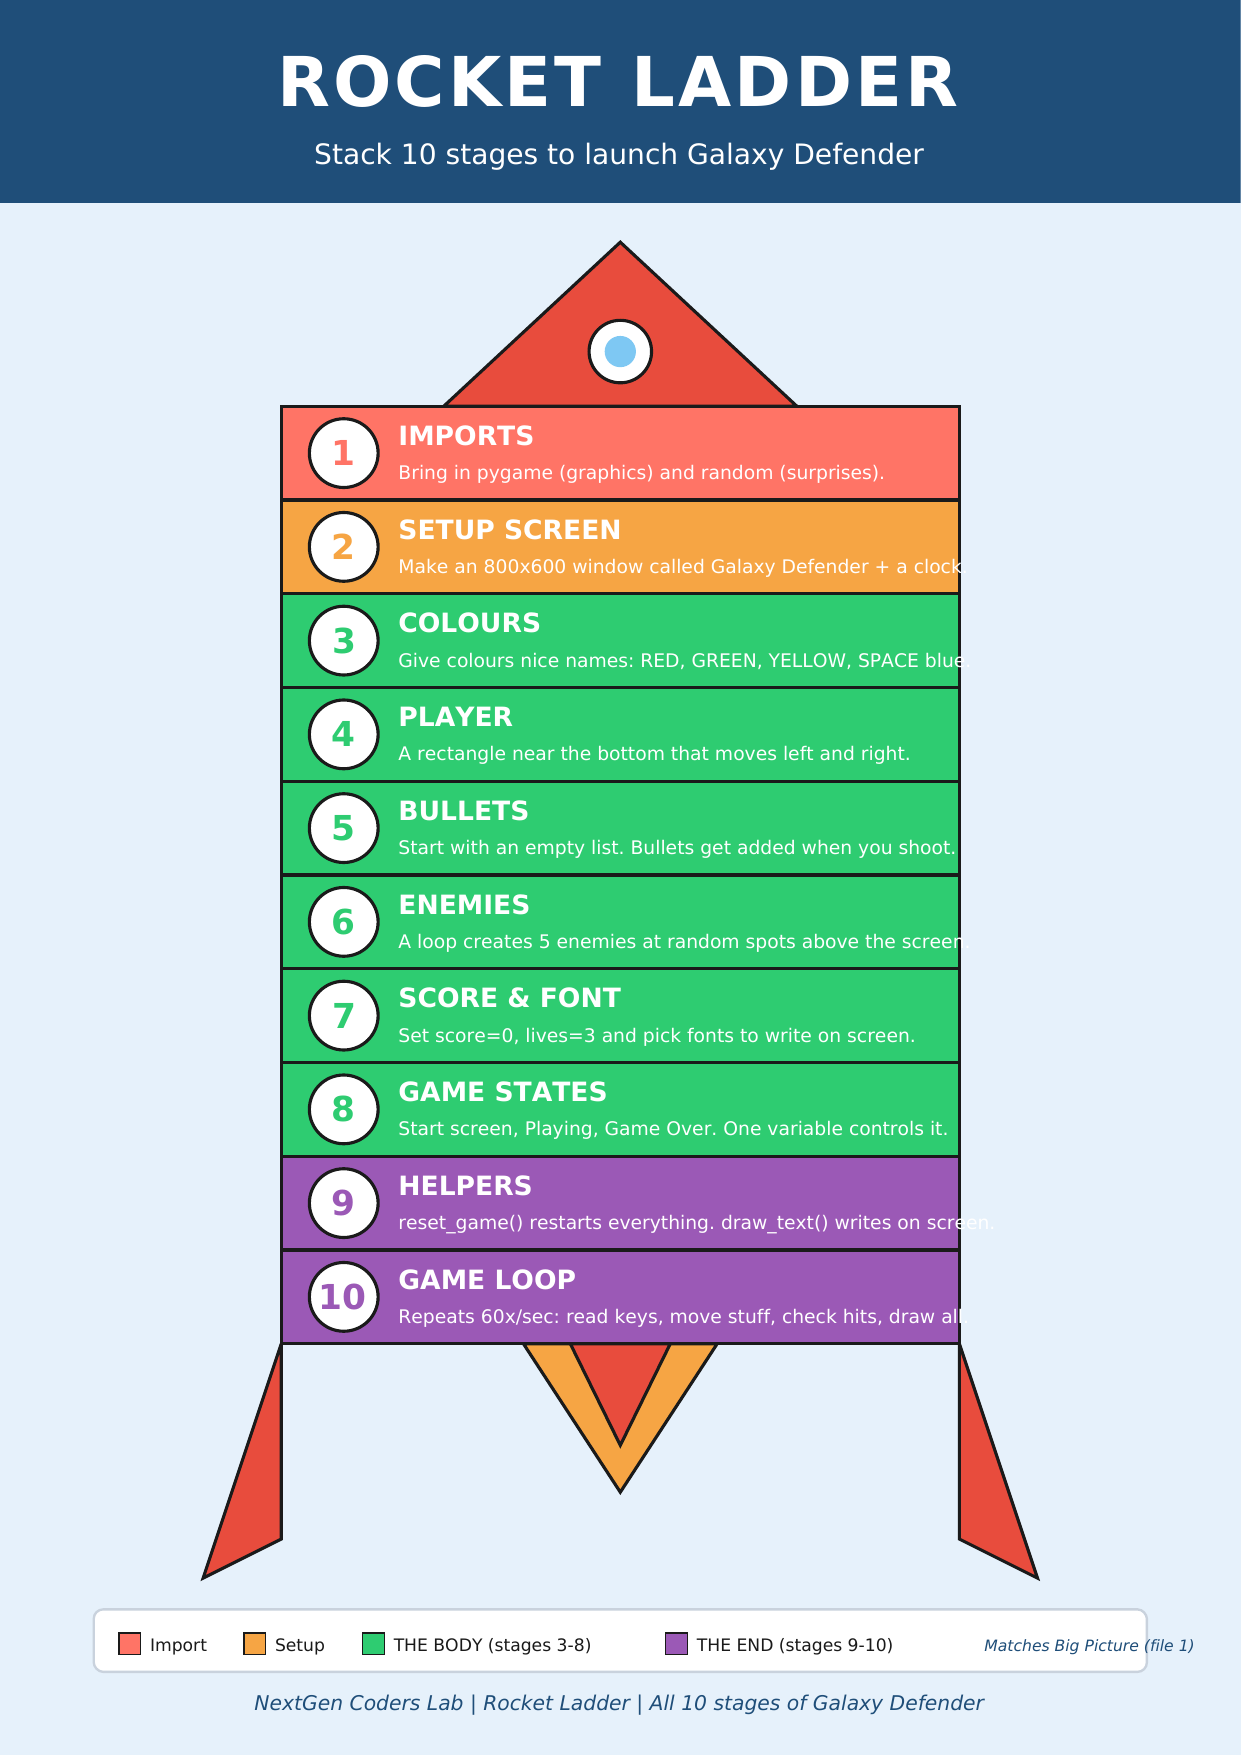
Where we are on the rocket
 ▶
◀
▶
◀
You're on Stage 2 of 10.
What is "setup the screen"?
In Stage 1 you grabbed the pygame toolbox. Now you're
going to open it and turn it on. Think of it like unboxing a new
TV: you take it out, plug it in, pick the screen size, and stick a name sticker on
the front. After this stage, you have a real, working game window — empty for now,
but ready for everything we add next.
The four things we do in Stage 2
-
pygame.init()— turn pygame ON. This starts every part of pygame (graphics, sound, fonts) so they're ready to use. Always run this once at the top. -
screen = pygame.display.set_mode((800, 600))— open a window that is 800 pixels wide and 600 pixels tall. The window goes into a variable calledscreenso we can draw on it later. (See the Pixel Cheat Sheet for what "pixels" means.) -
pygame.display.set_caption("Galaxy Defender")— put a title at the top of the window. This is the name everyone will see. -
clock = pygame.time.Clock()— create a clock. Later in the game loop, the clock makes sure the game runs at a steady speed (60 frames per second). Without it, games run too fast on fast computers and too slow on old ones.
The big idea: Stage 2 is the "blank canvas" of your game. Every later stage paints on top of this canvas.
The recipe
- Start with
import pygame(from Stage 1). - Turn pygame on with
pygame.init(). - Make a 800×600 window and save it in
screen. - Give the window a title:
"Galaxy Defender". - Make a
clockfor smooth speed. - Run a tiny loop so the window actually stays open (or it would close instantly).
Steps 1–5 are pure Stage 2. Step 6 is a sneak peek at Stage 10 (the Game Loop) — we just need it now so the window doesn't blink and disappear.
The code so far
# Stage 1 — Imports
import pygame

# Stage 2 — Setup the Screen
pygame.init()

WIDTH = 800
HEIGHT = 600
screen = pygame.display.set_mode((WIDTH, HEIGHT))
pygame.display.set_caption("Galaxy Defender")
clock = pygame.time.Clock()

# Tiny loop so we can actually SEE the window
# (we'll learn this properly in Stage 10)
running = True
while running:
    for event in pygame.event.get():
        if event.type == pygame.QUIT:
            running = False
    screen.fill((0, 0, 50))   # paint it space-blue so we know it works
    pygame.display.flip()
    clock.tick(60)

pygame.quit()
Run this and you'll see a dark blue window titled Galaxy Defender. Click the close button to end the program. That's it — Stage 2 is done. 🎉
🎮 Want to play with more code? Scroll down to the Code Library (10 mini programs). Copy any program, paste it into the editor, and press the green ▶ Run button.
Type the code into this in-browser editor and press Run
Type the code above into the editor, then click ▶ Run.
🏆 Mini-challenges
- Change the window title from
"Galaxy Defender"to your own name. - Change
WIDTHto 400. What happens to the window? - Change
screen.fill((0, 0, 50))toscreen.fill((50, 0, 0)). What colour does the window turn?
Remember: colours are (Red, Green, Blue), each 0–255.
Handouts for this lesson
Print these, keep them open in another tab, or download them to your computer.
📚 Lesson 2 Code Library — 5 brand-new pygame mini-games made just for this stage: Hello Window, Click the Balloon, Spotlight, Colour Switcher, and Smiley Face. Each one comes with challenges to try.
📄 Lesson 2 Code Library (5 pygame games) 📄 Lesson 1 Code Library
🗺️ The big-picture handouts — keep these by your side for the whole course.
📄 Big Picture 📄 Rocket Ladder 📄 Pixel Cheat Sheet 📄 Code Recipe 🖼️ 6 Parts of a Turtle Program
🤖 Want to try your own idea? Ask an AI like Claude or ChatGPT something like "Write me a short pygame program that opens a window with a red circle in the middle", then paste the code into the Trinket above and click Run. Reading other people's code is one of the fastest ways to get better.